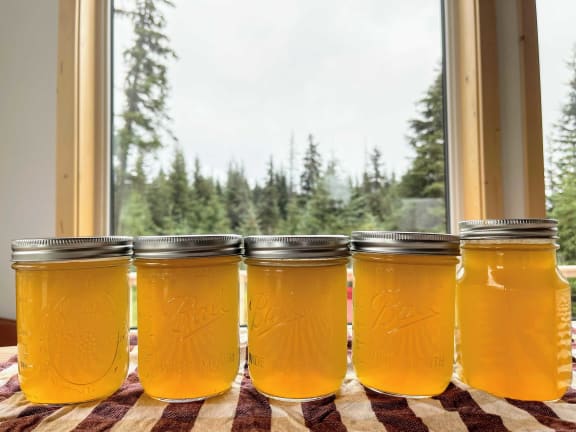
Don’t toss your spot prawn shells! They are going to be the secret ingredient behind so many of your home-cooked spot prawn meals. The shells of spot prawns — or the shells of any crustacean, for that matter — are packed with flavor that are readily infused into a versatile, delectable stock (or broth).
What’s prawn stock good for? Prawn stock is the perfect base of flavor in bisques, curries, or fish stews (for example, in bouillabaisse or cioppino). You can use prawn stock as your liquid of choice to cook grits or risotto. Even smaller amounts can take your prawn dishes to the next level; a splash of stock is enough to deglaze a pan or enhance the flavor of a seafood pasta sauce.
Since Wild Alaskan’s spot prawns come to you with their protective shells on, you will want to read on to learn how to make prawn stock using these shells.
Setting the Stage for a Flavorful Prawn Stock
First things first: Separate your prawn shells from your spot prawns.
Remove the shells — they should be relatively easy to peel after they are fully defrosted — taking care that you don’t damage the meat if you’re looking to keep your prawns whole. The shells and all the little legs (aka swimmerets) don’t need to stay intact, since you’re just using them for flavor, not for looks. Just set the shells in a bowl until you’re finished peeling the whole bunch, and make sure to return the prawn meat to the refrigerator if you’re not using those immediately so that your prawns stay properly chilled.
Before we go any further, if you don’t want to make a batch of stock now, or if you want to wait until you have more shells to work with, you can store them in a freezer-safe bag or container and stash them for up to a month or so before continuing on; you can certainly keep the unused shells frozen for longer than that, but try to use them sooner rather than later for best flavor.
If you’re ready to whip up a batch of tasty prawn stock now, heat up a tablespoon or two of olive oil over medium heat in a pot large enough so that your shells get plenty of contact with the bottom of the pot: They’ll fry up better this way. Once the oil is warm enough that it starts to shimmer, add in the prawn shells. You should hear a nice sizzle as soon as they hit the oil, as well as occasional popping and spattering; this sound indicates that you’re well on your way to unlocking the flavors hidden within.
Give the pot a stir or shake every now and then to ensure you’re frying up all the little bits. The shells should turn pink and a bit golden after just a few minutes of frying, as the sugars trapped within the shells have begun to caramelize. If it seems like the prawn shells are picking up too much color too quickly or if your oil is starting to smoke, just lower the heat accordingly or take the pot off the heat until things cool off a little.
The Basics for Building Your Stock
From here, all you really need to add is water to create a basic stock that extracts all the yummy flavors you’ve released from the prawn shells (when adding the water, rub the bottom of the pan with a wooden spoon or something to deglaze the pan after cooking the shells). But you likely will want to add some classic aromatic elements to your pot to build a more complex stock, if you have them on hand: maybe some onions and carrots (feel free to use the ends that you’d otherwise discard), a bit of celery, some garlic cloves, a few peppercorns and some sprigs of whatever fresh herbs you have around — parsley, thyme, rosemary. If you want your stock to lean toward South Asian flavors, you can add a chunk of ginger; to go even further East, perhaps some dried shiitakes or a piece of kombu.
For the lazy cook’s version of this step in stock-making, you can even just add some store-bought veggie stock to your pot of fried shrimp shells and skip the above.
Now, add your liquid. How much water (or veggie stock) will you need? Well, while there’s no need to fret over exact measurements here, you essentially want to add enough liquid to at least cover whatever cooked shells and raw veggies you have in your pot.
However, for the optimal concentration of prawn flavor, the shells you save from an 8 oz. bag of spot prawns should be enough to make a pint, or 2 cups, of prawn stock once you’ve simmered everything down, so you will want to add about 2 ½ cups or so of liquid to the pot at this point. If you’re making prawn stock from the shells you’ve saved from two 8 oz. bags, you’ll want to add about 5 cups of liquid here.
Turn Up the Heat
Once you’ve got your pot filled up, turn up the heat on your stove to bring everything to a boil, then reduce to a simmer. As your stock simmers, remember to skim impurities (any foamy residue that happens) from the surface. In about 20 minutes, you’ll have extracted all the flavor you can get from the ingredients in your pot. If it seems like you still have too much liquid left, you can continue to simmer it down in order to reduce your prawn stock to the proper concentration.
Note: Two cups of prawn stock is a good amount to have on hand when you want a splash here and there to add to your prawn-based dishes. We recommend freezing this into ½-cup portions in a silicone ice cube tray for ease of use. If you’ve made at least a quart, or 4 cups, of prawn stock, that should be plenty of stock for soups, stews, and liquid-intensive dishes like risotto.
The Finishing Touches
And now for the grand finale.
Wait until your stock is cool enough for you to feel comfortable transferring into another vessel. Then, pour the contents of your pot through a fine mesh strainer or some cheesecloth over a bowl that’s large enough that you can complete this step without losing a single drop of this rich, golden broth.
Once your strained prawn stock has cooled to room temperature, transfer to the storage container of your choice and refrigerate for up to four days; or, freeze for up to three months (for best flavor).